Covering Topics
- Introduction
- What is CDN?
- Azure CDN
- Create a storage account
- Create a blob container
- Upload your image files
- You can copy URL and view it in your browser
- Create CDN for your Blob storage
- Test your CDN and Blob storage
Introduction
Modern business world time is more important than ever and especially the software industry that is much more important than any other industry in the world. Because most of the modern businesses are heavily associated with the software industry. Therefore it needs to be faster and efficient more than ever.As we know, Web applications are delivering content via the internet. Therefore those applications are accessible to users all over the world who are based on different geographical locations. Further, those web applications can be hosted in different geo-locations.
Above facts, we already know as IT professionals. The real question is how do we deliver the content to the end users much faster. There are well-known methodologies which are currently in use to optimize the speed of delivering the content of a web application. These are a few well-known techniques to optimize your application to deliver content much faster.
- Use a Content Delivery Network (CDN)
- Minimize the number of JavaScript and CSS and use minified JS and CSS.
- Optimize the size of images/videos
- Use website caching techniques
- Reduce the number of plugins
- Implement Gzip Compression
- Database optimization in CMS
- Reduce the use of web fonts
- Use prefetching techniques etc.
- Host with a better hosting service provider
Among these techniques, this article is focused on CDN and how Azure CDN comes into the picture.
What is CDN?
The content delivery network (CDN) is a distributed system which can deliver content over the internet. Especially these types of networks have been used to deliver web content much faster and efficiently over the internet.
For example, delivering an image or video content is consuming much more bandwidth and it usually has a latency which can feel to end users. To deliver those types of content including JavaScript, CDN is a practical solution. Let's understand this through a simple use case scenario.
For example, delivering an image or video content is consuming much more bandwidth and it usually has a latency which can feel to end users. To deliver those types of content including JavaScript, CDN is a practical solution. Let's understand this through a simple use case scenario.
Use case
There is a web application which is a high-quality image content sharing application hosted in a server. Also, the users from all over the world can access the image gallery and also they can download those content.
 |
| Load image directly from blob storage |
 |
| Load image through CDN |
As we can see these images, it proves that image content delivered much faster with the content delivery networks (CDN). There are few well-known vendors provide these CDN services. Among those CDN vendors, Today we are going to focus on Azure CDN.
Azure CDN
Azure offers many different types of services to the users and it provides a CDN solution as well. It is easy to create a CDN for your application with Azure. Let's move with the above use case scenario.
Use case
There is a web application which is a high-quality image content sharing application hosted in a server. Also, the users from all over the world can access the image gallery and also they can download those content.
Let's achieve this step by step
1. Create a storage account
Log in to your Azure portal -> All Resources -> Storage Account ->Add

2. Create a blob container
NOTE - you can use Azure Storage Explorer to manage your blob storage
 |
| Azure Storage Explorer |
 |
| Create a new blob container |
NOTE - Blob storage is a Microsoft Azure solution to store a massive amount of unstructured data such as image, videos, text, etc.
You may need to understand the relationship between containers and blobs.

To learn more information about blob storage, you can follow Introduction to Azure Blob storage.
To learn more information about blob storage, you can follow Introduction to Azure Blob storage.
3. Upload your image files

4. You can copy URL and view it in your browser

5. Create CDN for your Blob storage
Option 1 - Create CDN via blob storage blade
Azure portal -> Open newly created Blob storage -> Azure CDN
 |
| Create Azure CDN via blob storage blade |
Option 2 - Create a CDN profile and connect your blob storage by creating an endpoint
Azure portal -> All Resources -> CDN Profile ->Add
 |
| Create a CDN Profile and connect to existing blob storage. |
NOTE - You may need to tick on "Create a new CDN endpoint now" checkbox to create an endpoint while creating the CDN profile (possible to do it later as well).
In this scenario, you need to select "Origin Type" as Storage and under "Origin hostname" will be listed in the dropdown lists.
you can find this "Origin hostname" endpoint URL under your Blob Storage -> Properties -> "Primary Blob Service Endpoint"
 |
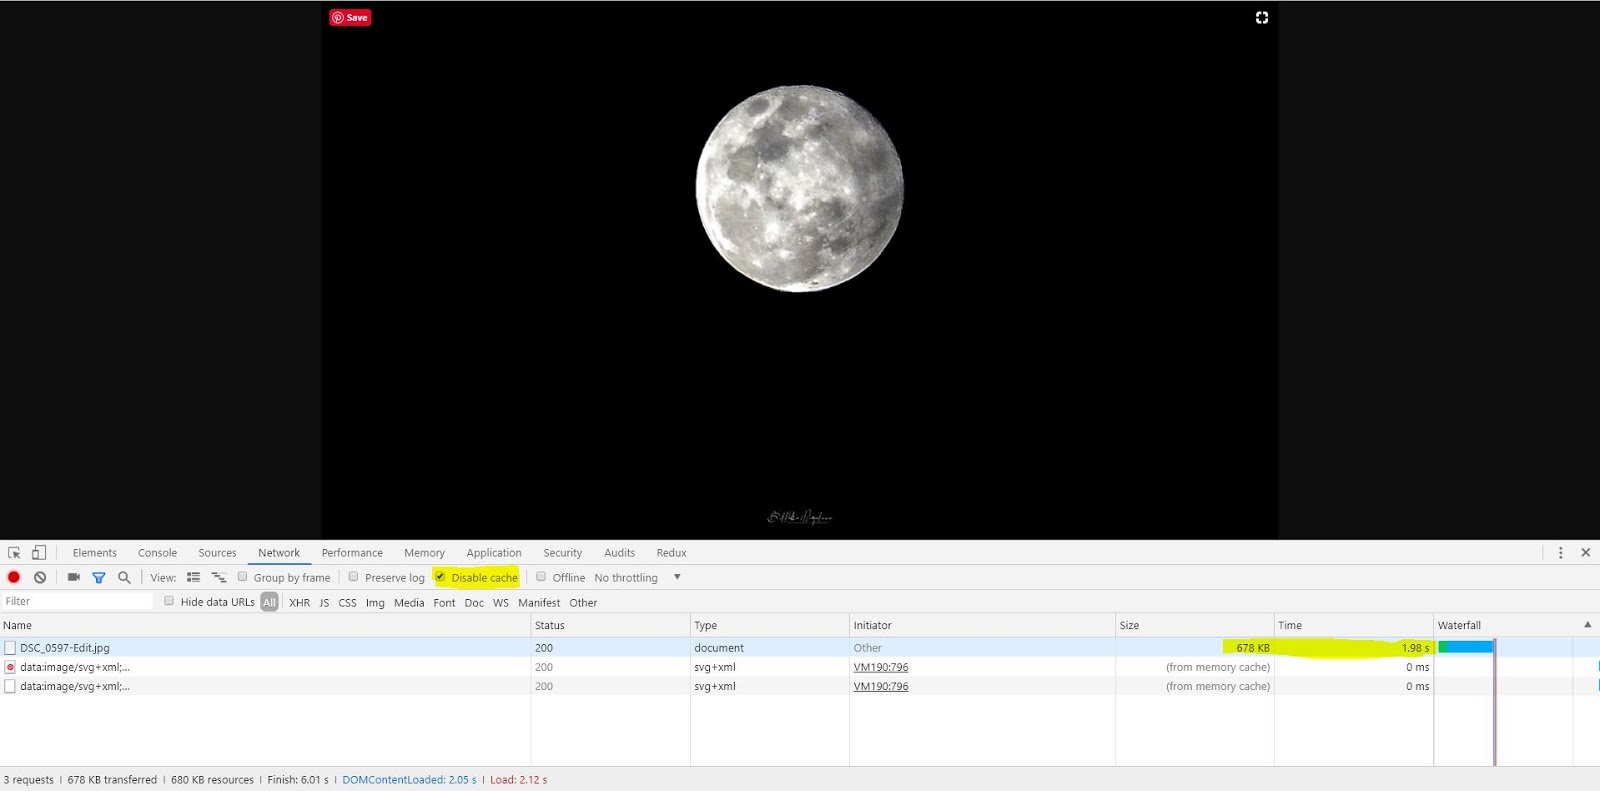
6. Test your CDN and Blob storage
- Open up a browser and open developer tools (F12) and go to the Network tab.
- Check "Disable Cache" so the request and data will not be cached in your browser.
- Copy your image URL from your Azure storage explorer and paste in the browser address.
- Check how much time it takes to load your image without a CDN.
- Repeat 1 and 2 steps.
- you can append your image URL with your CDN endpoint URL
- Blob Storage URL as follows https://{yourblobname}.blob.core.windows.net/{ContainerName}/image1.jpg
- Your CDN URL would be as follows. https://{your CDN Endpoint hostname}.azureedge.net/{ContainerName}/image1.jpg
- Check how much time it takes to load your image without a CDN.
- you can see that with a CDN it takes less time to load the image.
|
| Load image directly from blob storage |
|
| Load image through CDN |
Comments
Post a Comment